
前回はSysprepでマスターPCの一般化を行いました。

今回はマスターイメージをクローンPCに展開します。
まず、マスターPCのWindowsイメージをキャプチャ(取り出し)します。取り出したマスターイメージをクローンPCに展開したら、クローニングは完了です。
マスターイメージのキャプチャ
マスターイメージのキャプチャは、マスターPCのバックアップと手順はほとんど同じです。
ここでは細かい説明は省きますので、こちらの記事も合わせてご確認ください。
マスターPCをWindows PEで起動します。
Windows PEが起動すると、コマンドプロンプトのウィンドウが表示されます。
以下のコマンドを入力し、Windowsがインストールされているドライブ名と、外付けHDDのドライブ名を確認します。
echo list volume | diskpartWindowsがインストールされているドライブ名:C
外付けHDDのドライブ名:D
以下のコマンドを実行して、外付けHDDへマスターイメージをキャプチャします。
dism /Capture-Image /ImageFile:D:\after_sysprep.wim /CaptureDir:C:\ /Name:"after_sysprep"バックアップ処理の完了には時間がかかります。完了したら、以下のコマンドを実行して、パソコンを再起動します。
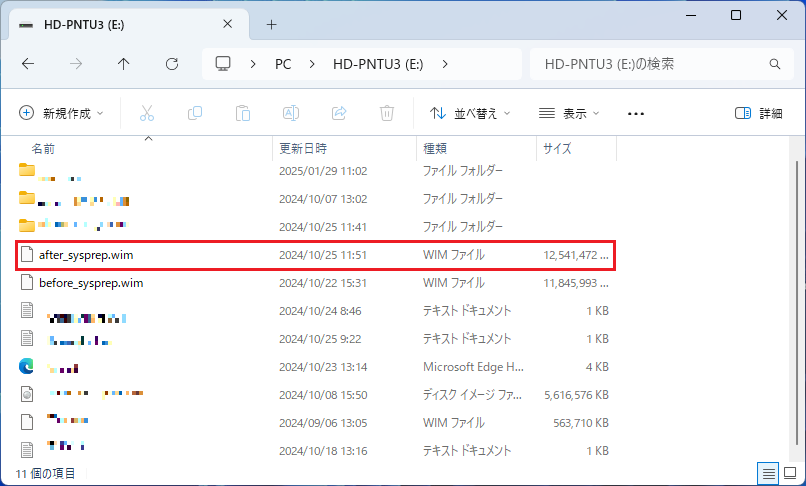
exit外付けHDDに「after_sysprep.wim」というファイルができていればOKです。
クローンPCに展開
スクリプトファイルを準備します。
下記の内容を、「CreatePartitions-UEFI.txt」というファイル名で、外付けHDDに保存します。
rem == CreatePartitions-UEFI.txt ==
rem == These commands are used with DiskPart to
rem create four partitions
rem for a UEFI/GPT-based PC.
rem Adjust the partition sizes to fill the drive
rem as necessary. ==
select disk 0
clean
convert gpt
rem == 1. System partition =========================
create partition efi size=100
rem ** NOTE: For Advanced Format 4Kn drives,
rem change this value to size = 260 **
format quick fs=fat32 label="System"
assign letter="S"
rem == 2. Microsoft Reserved (MSR) partition =======
create partition msr size=16
rem == 3. Windows partition ========================
rem == a. Create the Windows partition ==========
create partition primary
rem == b. Create space for the recovery tools ===
rem ** Update this size to match the size of
rem the recovery tools (winre.wim)
rem plus some free space.
shrink minimum=717
rem == c. Prepare the Windows partition =========
format quick fs=ntfs label="Windows"
assign letter="W"
rem === 4. Recovery partition ======================
create partition primary
format quick fs=ntfs label="Recovery"
assign letter="R"
set id="de94bba4-06d1-4d40-a16a-bfd50179d6ac"
gpt attributes=0x8000000000000001
list volume
exit下記の内容を、「HideRecoveryPartitions-UEFI.txt」というファイル名で、外付けHDDに保存します。
rem === HideRecoveryPartitions-UEFI.txt ===
rem ** This script assumes the partition layout from
rem CreatePartitions-UEFI or CreatePartitions-UEFI-FFU
select disk 0
select partition 4
set id=de94bba4-06d1-4d40-a16a-bfd50179d6ac
gpt attributes=0x8000000000000001
remove
list volume
exitクローンPCに外付けHDDを接続し、Windows PEで起動します。
Windows PEが起動すると、コマンドプロンプトのウィンドウが表示されます。
以下のコマンドを入力し、外付けHDDのドライブ名を確認します。
echo list volume | diskpart外付けHDDのドライブ名:D
パーティション作成のスクリプトを実行し、パーティションを作成します。
diskpart /s D:\CreatePartitions-UEFI.txtWindowsパーティションにマスターイメージを適用します。
dism /Apply-Image /ImageFile:D:\after_sysprep.wim /Index:1 /ApplyDir:W:\BCDbootツールを使用して、システムパーティションを構成します。
W:\Windows\System32\bcdboot W:\Windows /s S:回復パーティションに、Windows回復環境ツールをコピーします。
md R:\Recovery\WindowsRE
xcopy /h W:\Windows\System32\Recovery\winre.wim R:\Recovery\WindowsRE\エラーが解決しない場合は、winre.wimファイルを準備する必要があります。
こちらの記事を参考に、winre.wimファイルを取得して外付けHDDに設置してください。
回復ツールの場所を登録し、回復パーティションを非表示にします。
W:\Windows\System32\reagentc /setreimage /path R:\Recovery\WindowsRE /target W:\Windows
diskpart /s D:\HideRecoveryPartitions-UEFI.txt
以下のコマンドを入力し、Windows PEを終了します。
exit外付けHDDとWindows PEはもう使用しませんので、抜いておきます。
クローンPCを起動したら、個別の設定を行います。
- コンピューター名の設定
- ドメインの参加
- ライセンスキーの認証
- IPアドレスの設定
- 各種アプリケーションのインストール・ライセンス認証
まとめ クローニングでPC展開~マスターイメージの展開~
これでマスターイメージを元にしたクローンPCができあがりました。
マスターPCを作るまでは時間がかかりますが、一度完成してしまえばクローニングで効率的にパソコンをキッティングすることができます。
地道ではありますが、チャレンジしてみてください。

コメント